
Build a Theme from Your Brand
Last updated:
In this guide, you turn a logo or a style guide into a diagram theme with light and dark variants. You seed the Theme Generator from an image, adjust a seed or two, check the contrast estimate, and refine the result in the theme editor before applying it to a diagram.
Seed the generator from an image
Section titled “Seed the generator from an image”The fastest way to get brand colors is to let the generator pull them from a picture. A logo or an app screenshot works.
-
Open the IDE settings (
Command + Comma Command, Control + Alt + S CtrlAltS ) and go to Tools > Mermaid Studio > Custom Themes. -
Click Add and choose New Theme from Image….
-
Pick an image file (PNG, JPG, GIF, BMP, or SVG, up to 20 MB). The generator ranks the image’s distinct colors, fills Primary, Accent 1, and Accent 2 with the top three, and seeds Surface from the second.
-
The New Theme from Seeds dialog opens with those seeds in place, a name derived from the primary color, and a live preview of both variants.
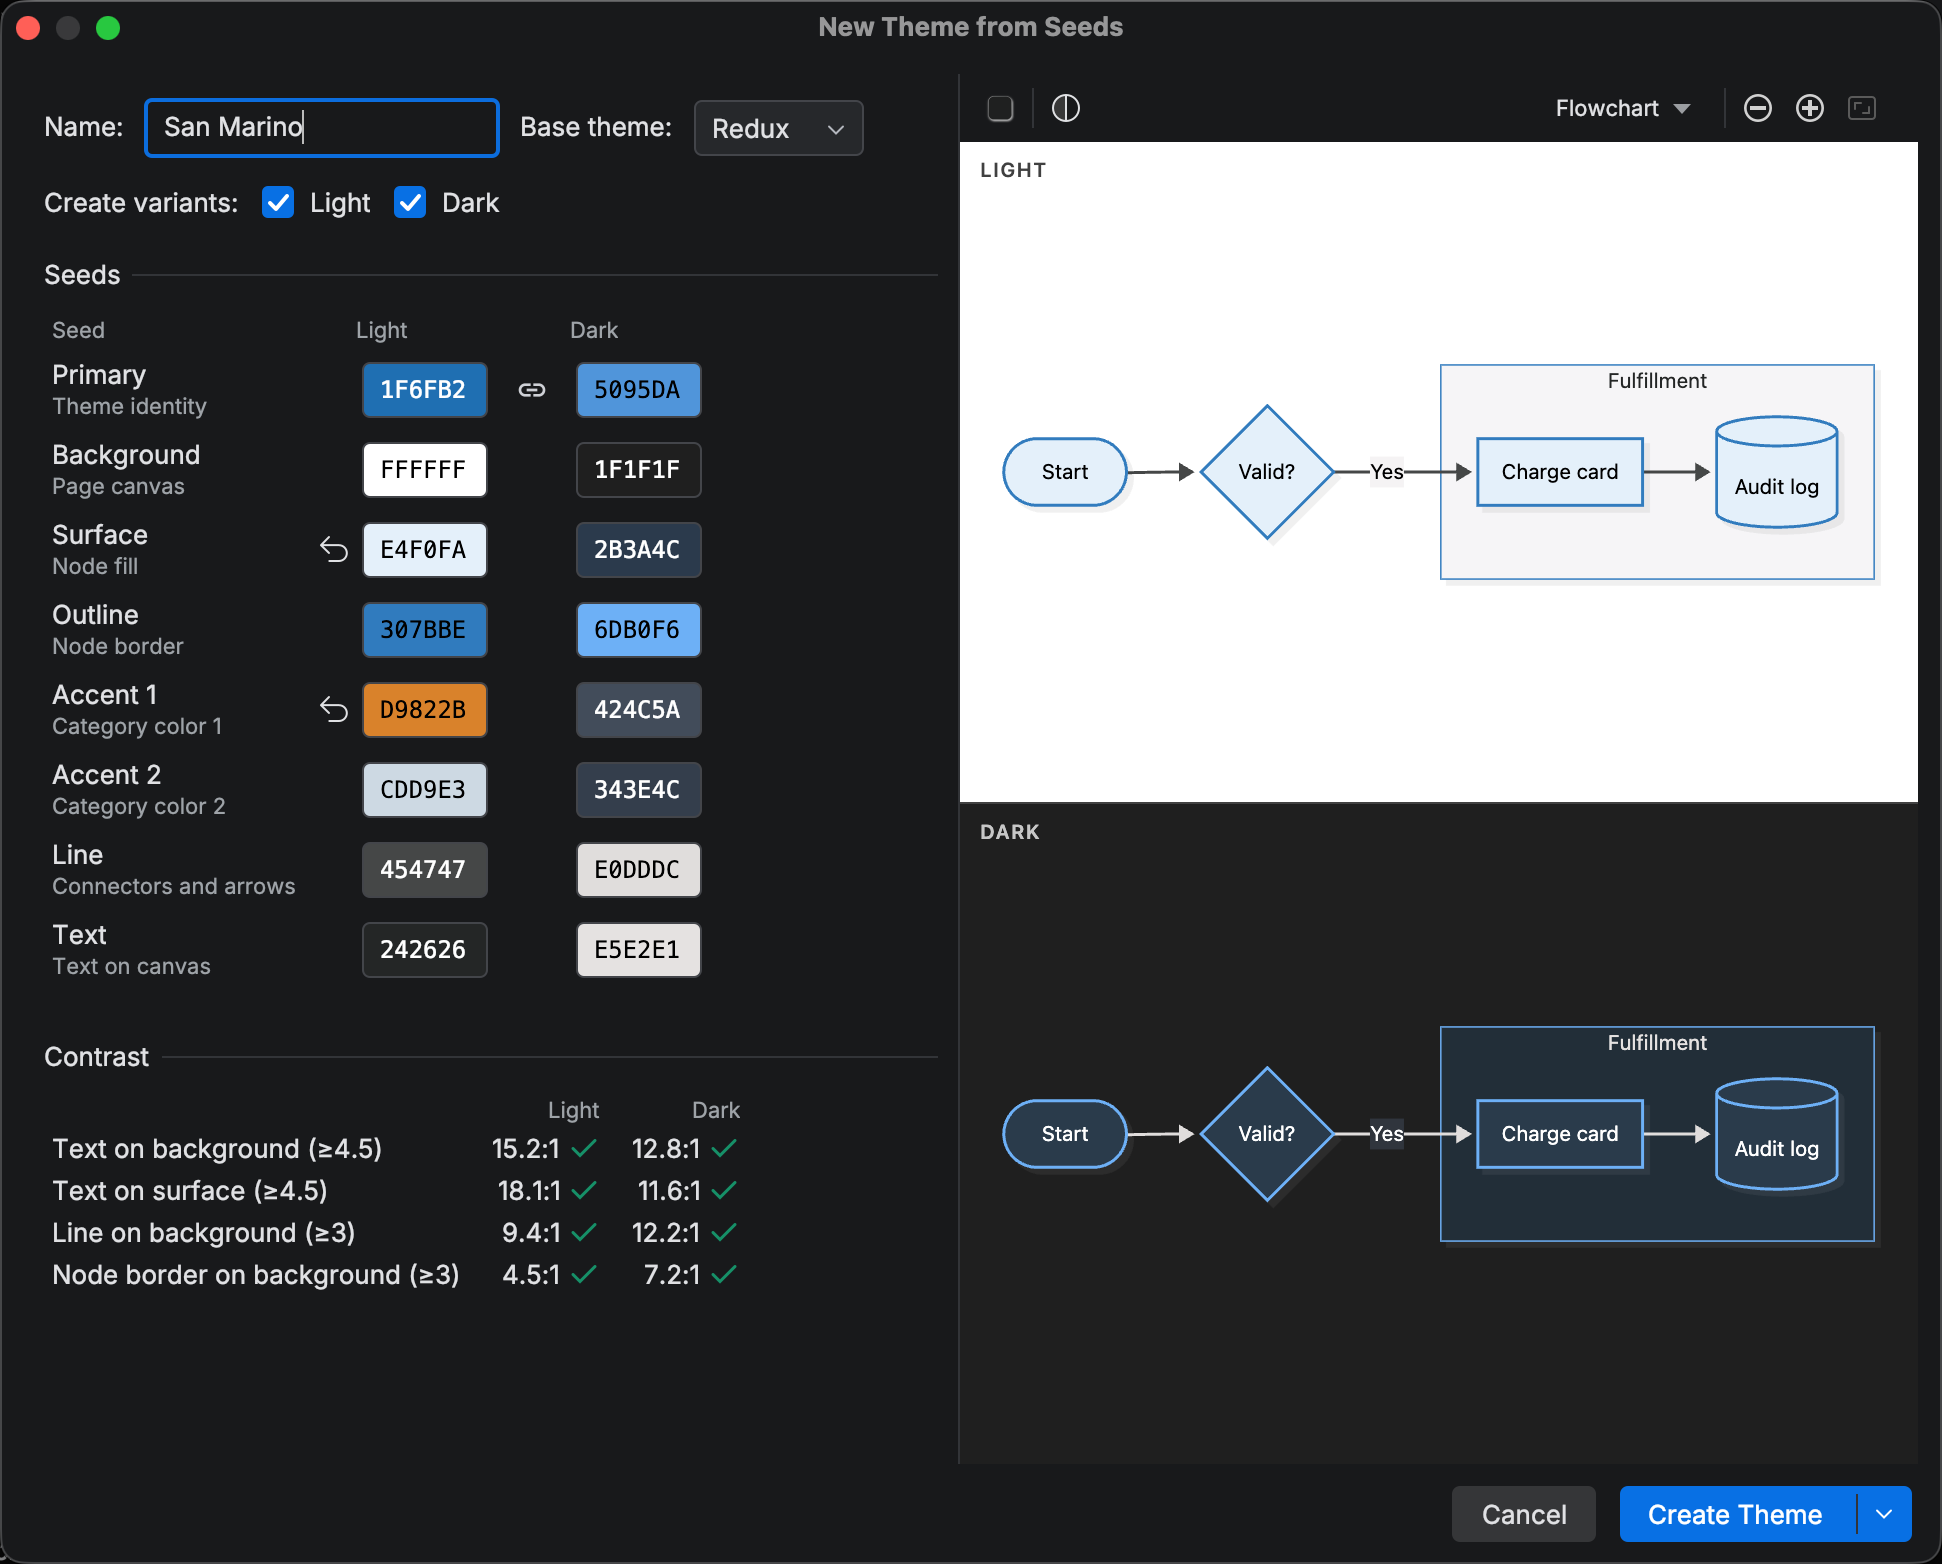
If you have a hex value rather than an image, click Add > New Theme… instead and set Primary by hand. Inside any seed’s color picker, Pick Color from Screen samples a pixel from anywhere on screen, so you can pick straight off a style guide open in a browser.
Adjust the seeds
Section titled “Adjust the seeds”The extractor assigns seeds by prominence in the image, and your brand may give those colors different roles. Review each row before you create the theme. Every seed’s color picker keeps the image’s full palette in an Image colors group, so you can swap any extracted color into any seed, beyond the three the generator picked.
-
Confirm Primary is the brand color. The Light and Dark cells share a hue by default, so both variants keep the brand hue.
-
Look at Surface, the node fill. A near-white surface gives an outlined look, a tinted surface gives filled nodes, and a second hue splits fills from strokes. Click Reset to Auto on any seed you would rather let the generator derive.
-
Read the Contrast box. It reports four pairs against WCAG targets. A below-target row usually means Surface or Text should have its tone adjusted to improve contrast.
-
Rename the theme if the generated name does not fit. Once you edit the name, a Restore Generated Name control appears in case you want the automatic name back.
Cycle the look button through Classic, Hand Drawn, and Neo to check the palette in each rendering style.
Create and refine
Section titled “Create and refine”If the preview already looks right, Create Theme stores the theme and closes the dialog. To fine-tune individual variables, Create and Refine… stores it and opens the theme editor on the new row.
-
Click the arrow next to Create Theme and choose Create and Refine….
-
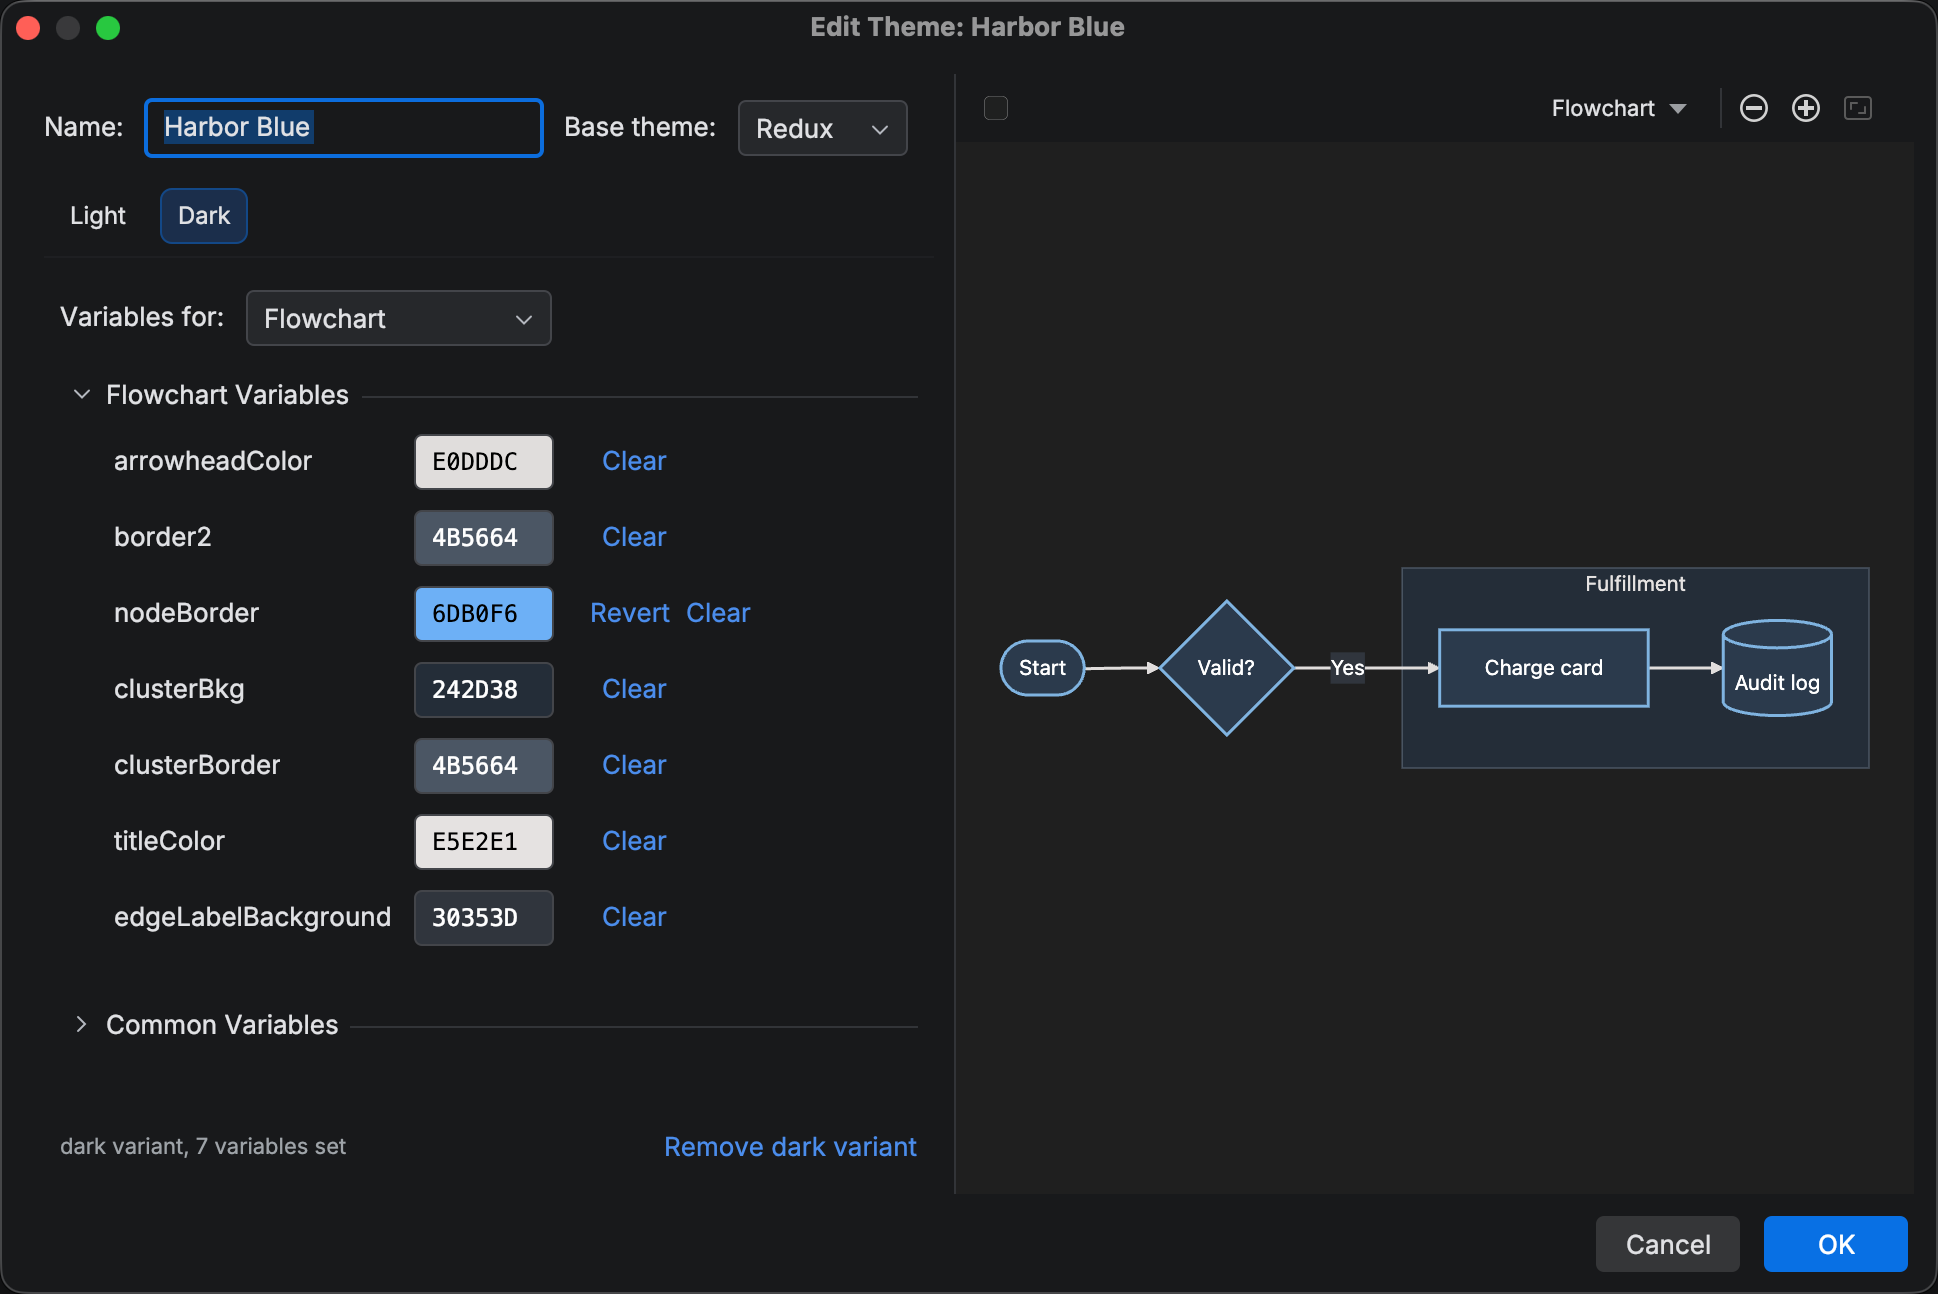
In the editor, switch between the Light and Dark tabs to review each variant.
-
Use the Variables for selector to scope the form to one diagram type, such as Sequence or Gantt, and adjust any variable the brand needs. A field showing Inherit falls back to the theme’s common value, then to the base theme.
-
Click OK. Canceling the editor keeps the theme the generator already created.
The plugin stores the theme as soon as the dialog closes, so it is ready to apply right away.
Apply the theme to a diagram
Section titled “Apply the theme to a diagram”Applying writes the theme into the diagram’s frontmatter.
-
Open a
.mmdfile and click Appearance in the preview toolbar. -
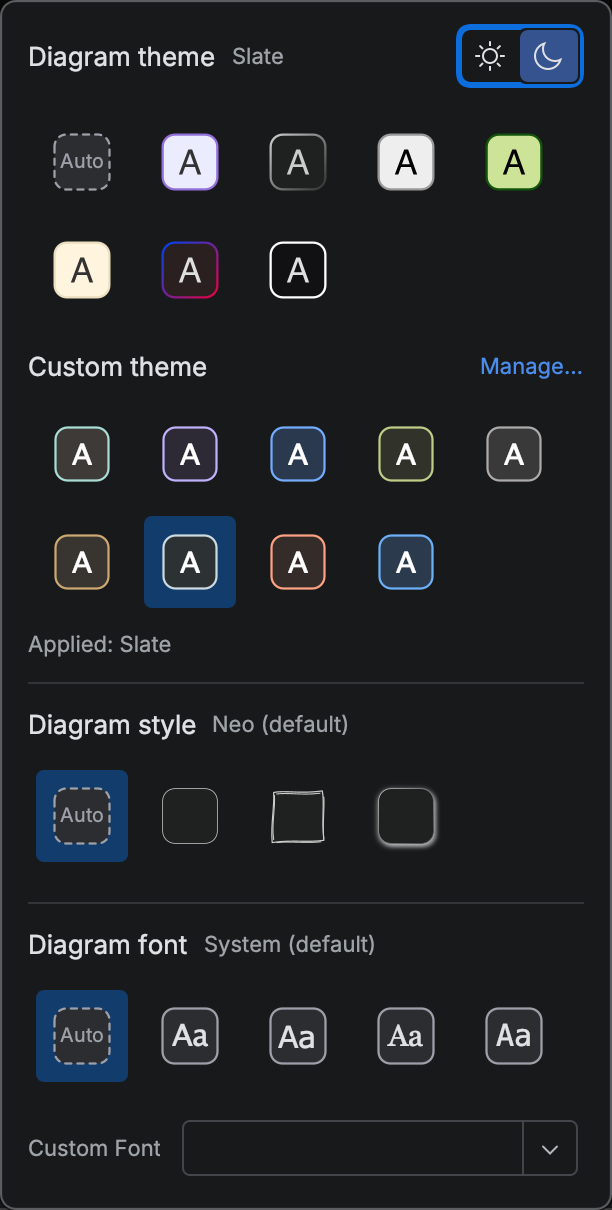
Under Custom theme, click your theme’s swatch. The Light/Dark toggle at the top of the popup switches between the two variants;
Command + L CommandL Control + L CtrlL andCommand + D CommandD Control + D CtrlD do the same from the keyboard.
The frontmatter now contains the resolved theme plus a marker that lets Mermaid Studio switch variants later. Trimmed, it looks like this:
---x-mermaid-studio: theme: id: 4f2a9c1e-7b3d-4e8a-9c21-5d6f7a8b9c0d name: Cobaltconfig: theme: redux themeVariables: primaryColor: '#E3ECFA' primaryBorderColor: '#1F4E9E' lineColor: '#3C4A5E'---flowchart LR A[Request] --> B{Valid?} B -->|Yes| C[Process] B -->|No| D[Reject]Mermaid.js and GitHub ignore the x-mermaid-studio key, so the diagram renders the same outside the IDE.
Only the values in config reach the renderer.
An apply writes literal values, so after editing a theme, reapply it to update an existing diagram.
Verify outside the IDE
Section titled “Verify outside the IDE”Commit the file and open it on GitHub, or paste the source into the Mermaid Live Editor. The rendering matches the IDE preview’s light variant, because the applied frontmatter is plain Mermaid.js configuration.
To move the theme to another machine, see Import and Export.
Related
Section titled “Related”- Custom Themes overview for the bundled library and where themes appear
- Theme Generator for every seed and control in the generator
- Theme editor for per-diagram-type variables