
Visual Editing
Last updated:
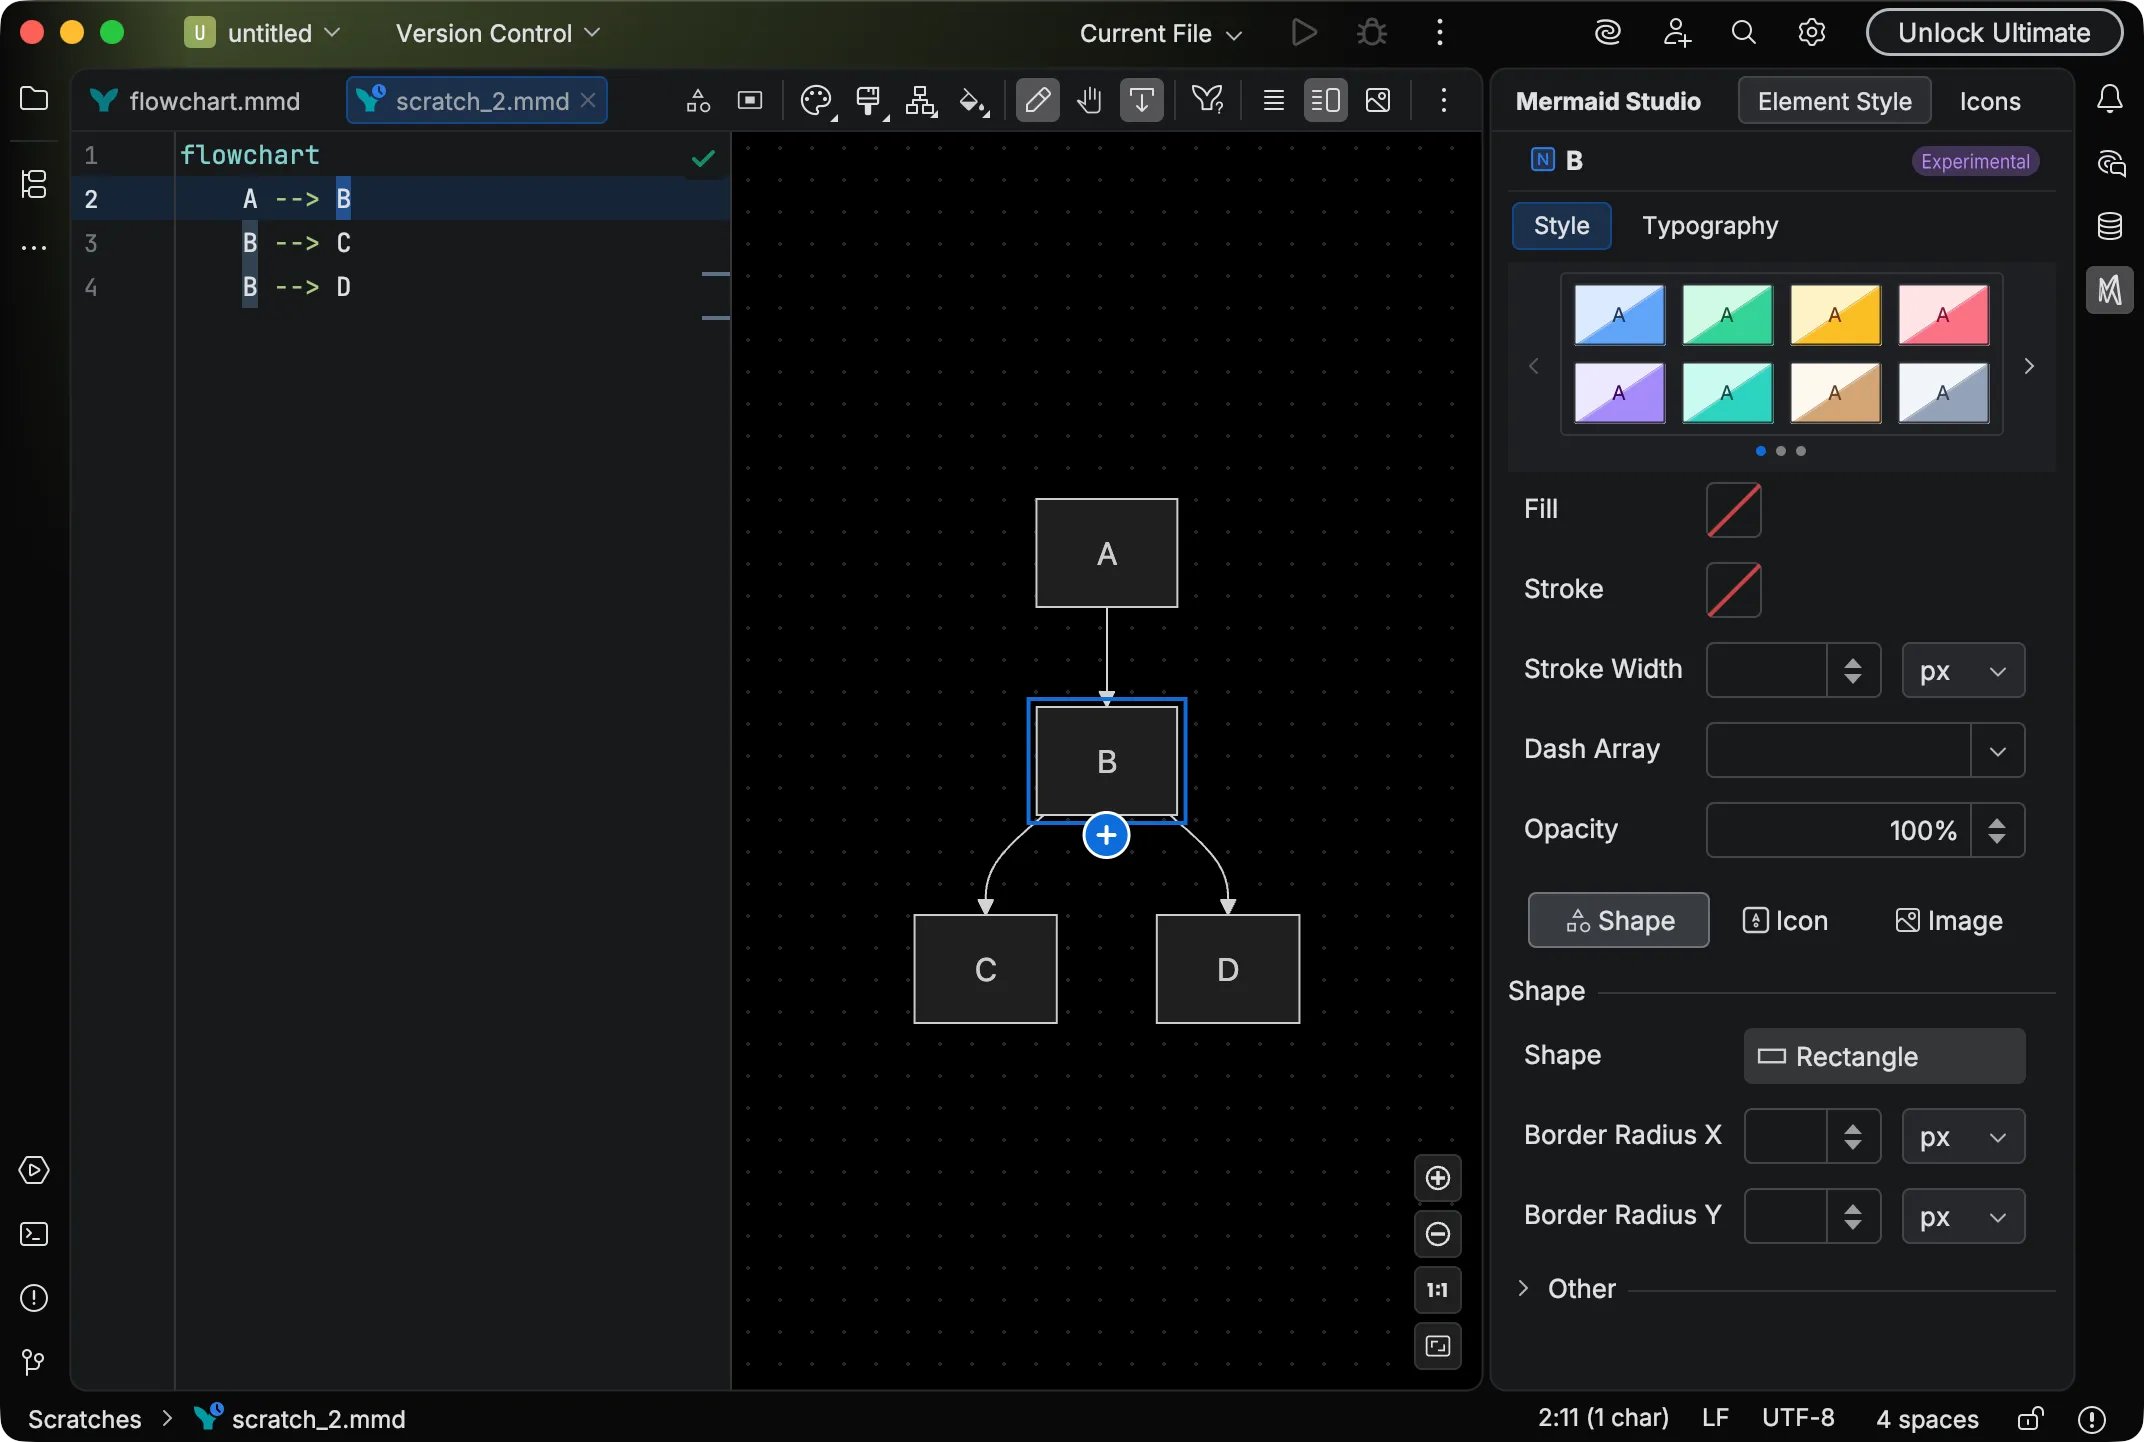
Visual editing turns the live preview from a passive display into an interactive canvas. You select, drag, connect, and inline-edit elements directly in the preview, and every change is written back to the source. Its other half is the Element Style pane, a property inspector that restyles the selected element (colors, presets, and diagram-type-specific controls) and writes the result back as Mermaid styling syntax.
Supported diagram types
Section titled “Supported diagram types”The available actions depend on the active diagram type, and the exact capabilities are not identical across them. Some of those differences are deliberate (an interaction that fits one diagram type may not fit another), and others reflect that visual editing is built out iteratively per diagram type rather than reaching full parity all at once. The table below is generated from the latest plugin release; click a diagram name for the actions and shortcuts specific to that type.
| Diagram | Click Navigation | Inline Edit | Node Move | Add Element | Edge Retarget | Group | Delete | Style Pane |
|---|---|---|---|---|---|---|---|---|
| Flowchart | ✓ | ✓ | ✓ | ✓ | ✓ | ✓ | ✓ | ✓ |
| Swimlane | ✓ | ✓ | ✓ | ✓ | ✓ | ✓ | ✓ | ✓ |
| Class | ✓ | ✓ | — | — | — | — | ✓ | ✓ |
| State | ✓ | — | — | — | — | — | ✓ | — |
| Architecture | ✓ | — | — | — | — | — | — | — |
| Block | ✓ | — | — | — | — | — | — | — |
| Entity Relationship | ✓ | — | — | — | — | — | — | — |
| Mindmap | ✓ | — | — | — | — | — | — | — |
| Requirement | ✓ | — | — | — | — | — | — | — |
| Sequence | ✓ | — | — | — | — | — | — | — |
Visual editing is added selectively, for high-value diagram types: commonly used ones whose syntax is involved enough, or whose element-level styling is rich enough, to justify the UX investment. Support for additional diagram types will be added in future releases.
Edit Mode
Section titled “Edit Mode”The Edit Mode toggle (pencil icon) in the preview toolbar flips the preview between preview mode and visual editing.
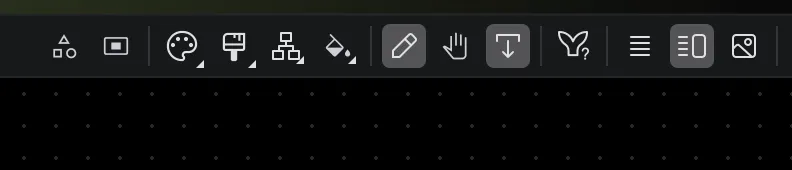
The left-most group of toolbar actions is specific to the current diagram type. For flowcharts these are Add Node (opens the shape picker) and Add Subgraph (inserts a new container); other diagram types contribute their own. Swimlane diagrams add Add Swimlane and let you drag a lane in the preview to reorder it, writing the new lane order back to the source.
The clip below shows a swimlane lane being dragged into a new position, with the source updating to match.
The rest of the toolbar is the same for every diagram type, from left to right:
- Theme — Set the Mermaid.js theme (Auto, Default, Dark, Forest, Neutral, Base)
- Look — Set the rendering style (Auto, Classic, Hand Drawn, Neo)
- Layout — Set the layout algorithm (Auto, Dagre, ELK, and more; see Layout)
- Background — Set the preview background color
- Edit Mode — Toggle edit mode on or off (pencil icon)
- Pan Mode — Toggle left-click panning (hand icon)
- Caret Tracking — Sync editor cursor with preview highlighting
- Diagram Documentation — Open Mermaid.js docs for the current diagram type
A dot grid background appears behind the diagram when edit mode is active.
In preview mode (edit mode off), the diagram behaves like a standard Mermaid.js render.
Built-in Mermaid.js interactivity such as actor menus and external links works normally, and you can navigate to source by holding
In edit mode, clicking an element navigates directly to its source declaration without needing a modifier key. The selection, manipulation, and creation features described on each diagram-type page become available.
Pan Mode
Section titled “Pan Mode”The Pan Mode toggle in the preview toolbar switches between selection and panning.
When pan mode is active, left-click dragging pans the viewport instead of selecting elements. You can still click individual elements to select them.
Middle-click dragging always pans the diagram regardless of whether pan mode is enabled.
Caret Tracking
Section titled “Caret Tracking”The Caret Tracking toggle (autoscroll icon) in the preview toolbar links cursor movement in the editor with element highlighting in the preview.
With caret tracking on, moving the cursor to a diagram element in the source code highlights the corresponding element in the preview and updates the Element Style pane.
Caret tracking is off by default for .mmd files and can be toggled as needed.
In Markdown files, caret tracking is always active.
Navigation
Section titled “Navigation”Visual editing provides bidirectional navigation between the source code and the rendered diagram.
- Preview to source — Click an element in the preview to jump to its declaration in the editor. In preview mode (edit mode off), hold
Command Command Control Ctrl and click instead. Preview-to-source navigation is available across a subset of diagram types. - Hover highlighting — Navigable elements highlight when you hover over them, signalling what you can interact with.
Selection
Section titled “Selection”Single selection
Section titled “Single selection”Click an element in the preview to select it. The selected element is highlighted, and its source range is selected in the editor.
Multi-selection
Section titled “Multi-selection”Build up a selection of multiple elements using any of these methods:
- Shift+Click an element to add or remove it from the current selection.
- Marquee select — Click and drag on an empty area of the canvas to draw a selection rectangle around multiple elements.
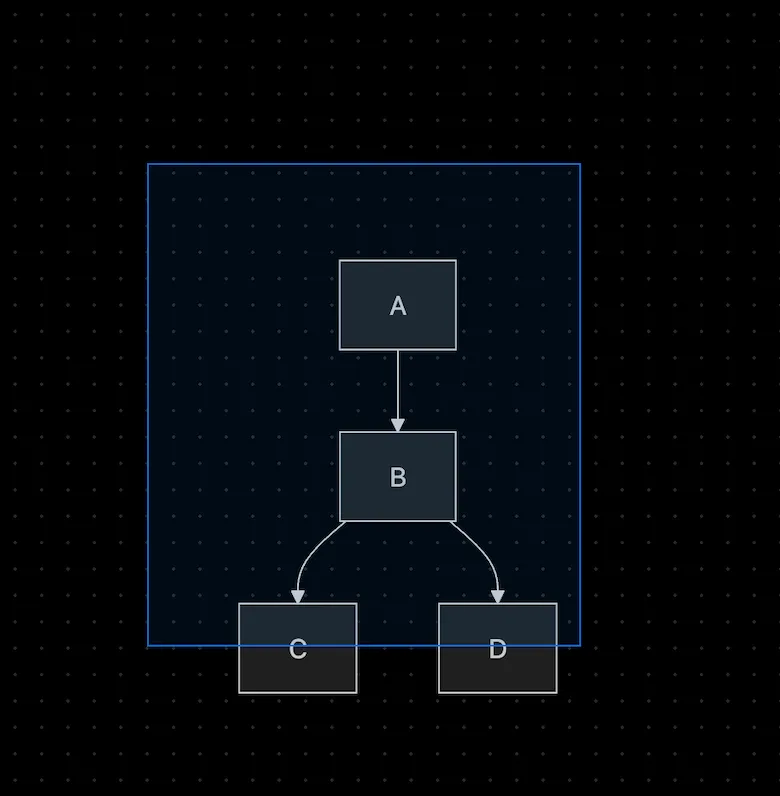
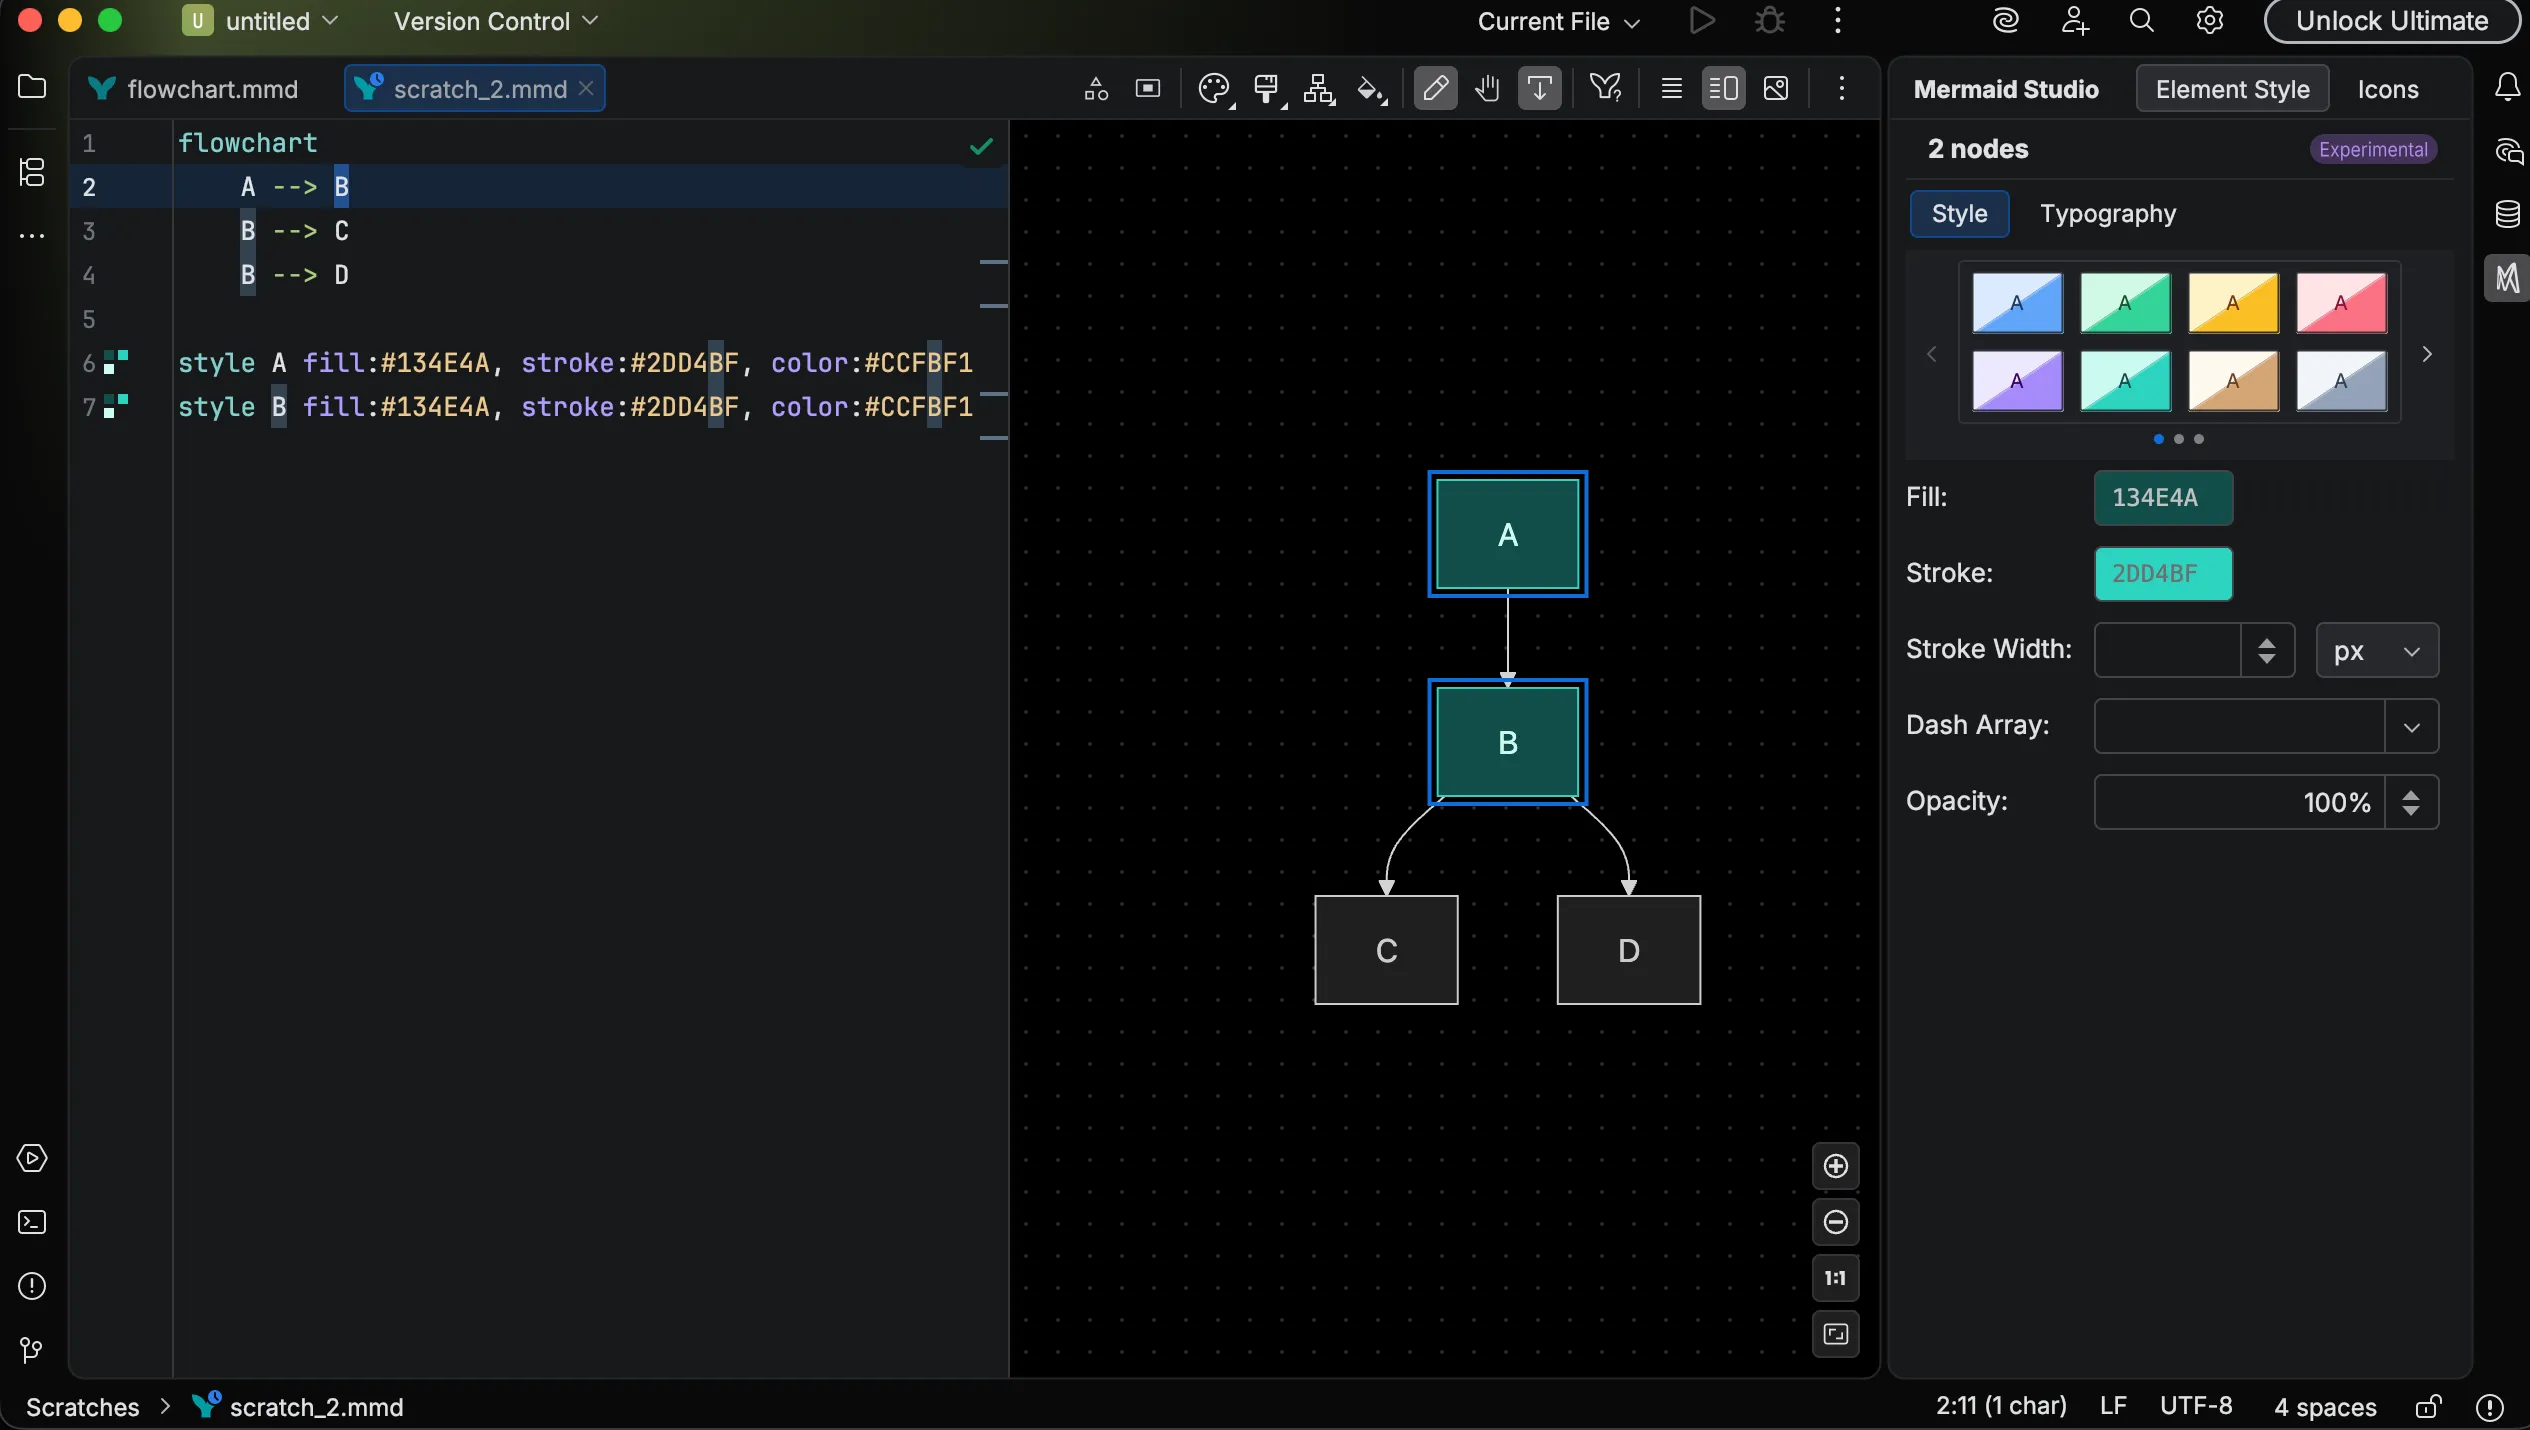
When multiple elements are selected, the Element Style pane shows only the properties common to all of them.
Each diagram type adds its own structural selection commands (parent / children / siblings, container traversal, and so on). See the diagram-type pages linked above for the specific shortcuts.
Grouping
Section titled “Grouping”In flowchart and swimlane diagrams, you can wrap a selection in a container and lift it back out again without editing the source by hand.
- Group — Select one or more elements and press
Command + G CommandG Control + G CtrlG to wrap them in a new subgraph. The Add Subgraph toolbar action inserts an empty container instead. - Ungroup — Select a subgraph and press
Command + Shift + G CommandShiftG Control + Shift + G CtrlShiftG to lift its members into the parent scope and remove the container.
Flowchart subgraphs can also be collapsed and expanded from the preview on Mermaid.js 11.17.0 or later.
The clip below selects a subgraph and ungroups it, reparenting its members to the enclosing scope.
Inline label editing
Section titled “Inline label editing”Double-click an element in the preview to edit its label inline.
An editable text overlay appears over the element, and the change is written back to the source when you commit it (press
Typography
Section titled “Typography”Press
Deleting elements
Section titled “Deleting elements”Press
All visual-editing actions integrate with the IDE’s undo system.
Press
Renaming a selected element via Refactor > Rename follows through to both the Element Style pane header and the preview highlight automatically. The selection clears only when the element is actually deleted, so a rename keeps your in-progress styling work pinned to the element you just renamed.
See also
Section titled “See also”- Live Preview for zoom, pan, and toolbar controls.
- Element Style pane for the property inspector that pairs with selection.
- Keyboard Shortcuts for a consolidated shortcut reference.